Getting started with the ESP8266 can be a bit bewildering. This guide should be a good starting point to quickly get into developping for the ESP8266. There are many ESPs available on the market however we will only be concentrating on a two in this article. Different ESPs should follow similarly but may be different to set up. I use Mac OS X so for people running Windows some extra Googling may be required.
The ESPs we will look at are the ESP-07 and the D1 mini V2. Almost all components in this article can found very cheaply on AliExpress if you don't mind the waiting time. The ESP-07 is quite barebones while the D1 mini V2 is a lot easier to get started with.
D1 mini
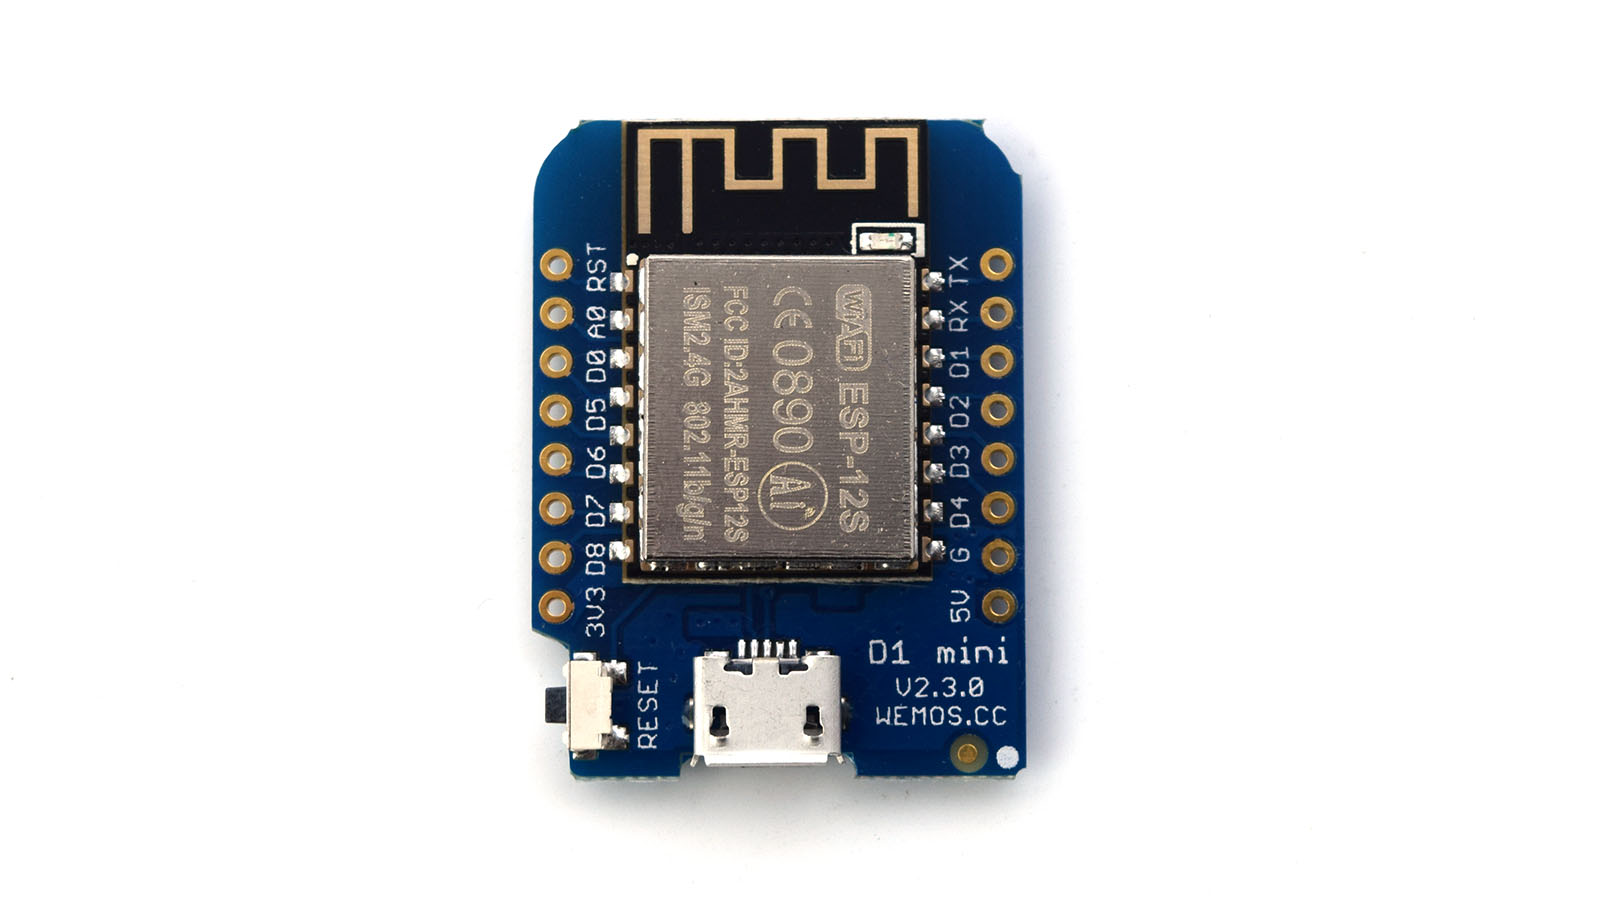
The D1 mini by Wemos is an ESP8266 on a breadboard friendly board with built in USB to serial. It does not require any shorting of pins for flashing.
 {.medium}
When using the D1 Mini with the Arduino Core, the pinouts are given in a table below: [^1]
| D1 Mini Pin | Software Pin |
|---|---|
| D0 | 16 |
| D1 | 5 |
| D2 | 4 |
| D3 | 0 |
| D4 | 2 |
| D5 | 14 |
| D6 | 12 |
| D7 | 13 |
| D8 | 15 |
| RX | 3 |
| TX | 11 |
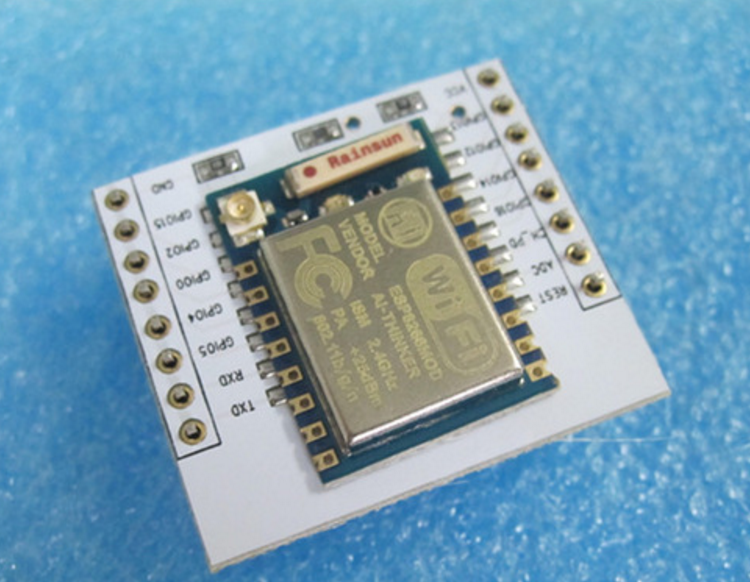
The ESP-07
I would advise buying the newer ESP-12E as it comes with 4mb memory.
 {.medium}
When you buy the ESP-07 make sure that it includes an adapter plate so that it can be plugged into a breadboard.
Parts List
- ESP-07 with adapter plate,
- Breadboard,
- Wires for breadboard without connector so that they can fit underneath the adapter plate,
- 3.3V power supply (or 5V/12V power supply with stepdown to 3.3V),
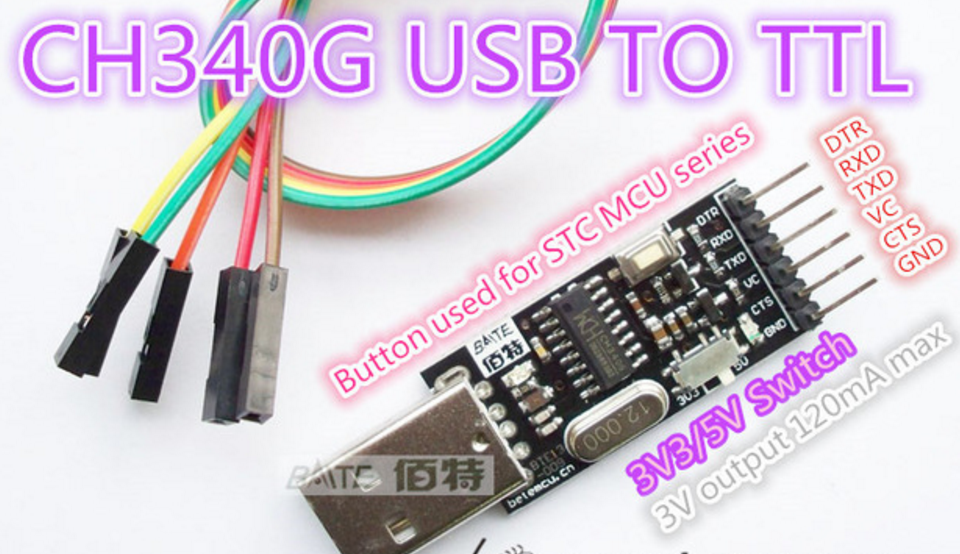
- USB to serial converter (model name: CH340G).
For the USB to serial converter I found that the CH340G works well with Mac OS X. The signed driver for Windows and Mac can be found here, or alternatively you can download the Mac driver straight from my site.
 {.medium}
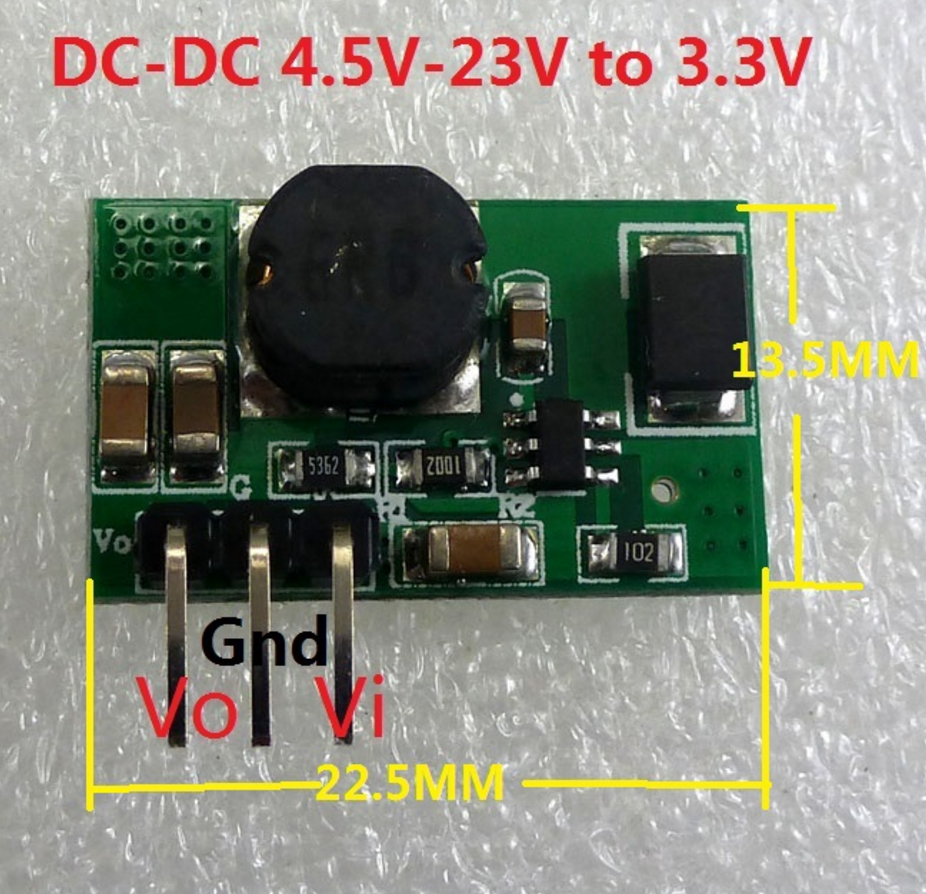
The ESP-07 (and all similar ESPs) run on 3.3V. The CH340G USB to serial converter may have a mode to provide power at 3.3V however this may not be enough power since the ESP can be quite power hungry. You can use something like 4.5-23V to 3.3V step down module to power the ESP. I've pictured the one I use below.
 {.medium}
Wiring
The ESP-07 should be wired up as written in the table below. Note that GPIO0 should be connected to GND only when flashing. When connecting GPIO0 to GND, first disconnect all power to the ESP, connect the pin and then reconnect the power.
Only use one power source to power everything. For example, when using an external power source supplying 3.3V, this represents VCC. The 3.3V from the USB to Serial should not be used. The GND from everything should be connected. That is to say, the GND from the USB to serial, from the power source and from GND and GPIO15 pins on the ESP should be connected.
| ESP | Serial Converter and Power |
|---|---|
Tx |
Rx |
Rx |
Tx |
Vcc |
VCC |
GND |
GND |
GPIO15 |
GND |
CH_PD |
VCC |
GPIO0 |
GND For Flashing Only |
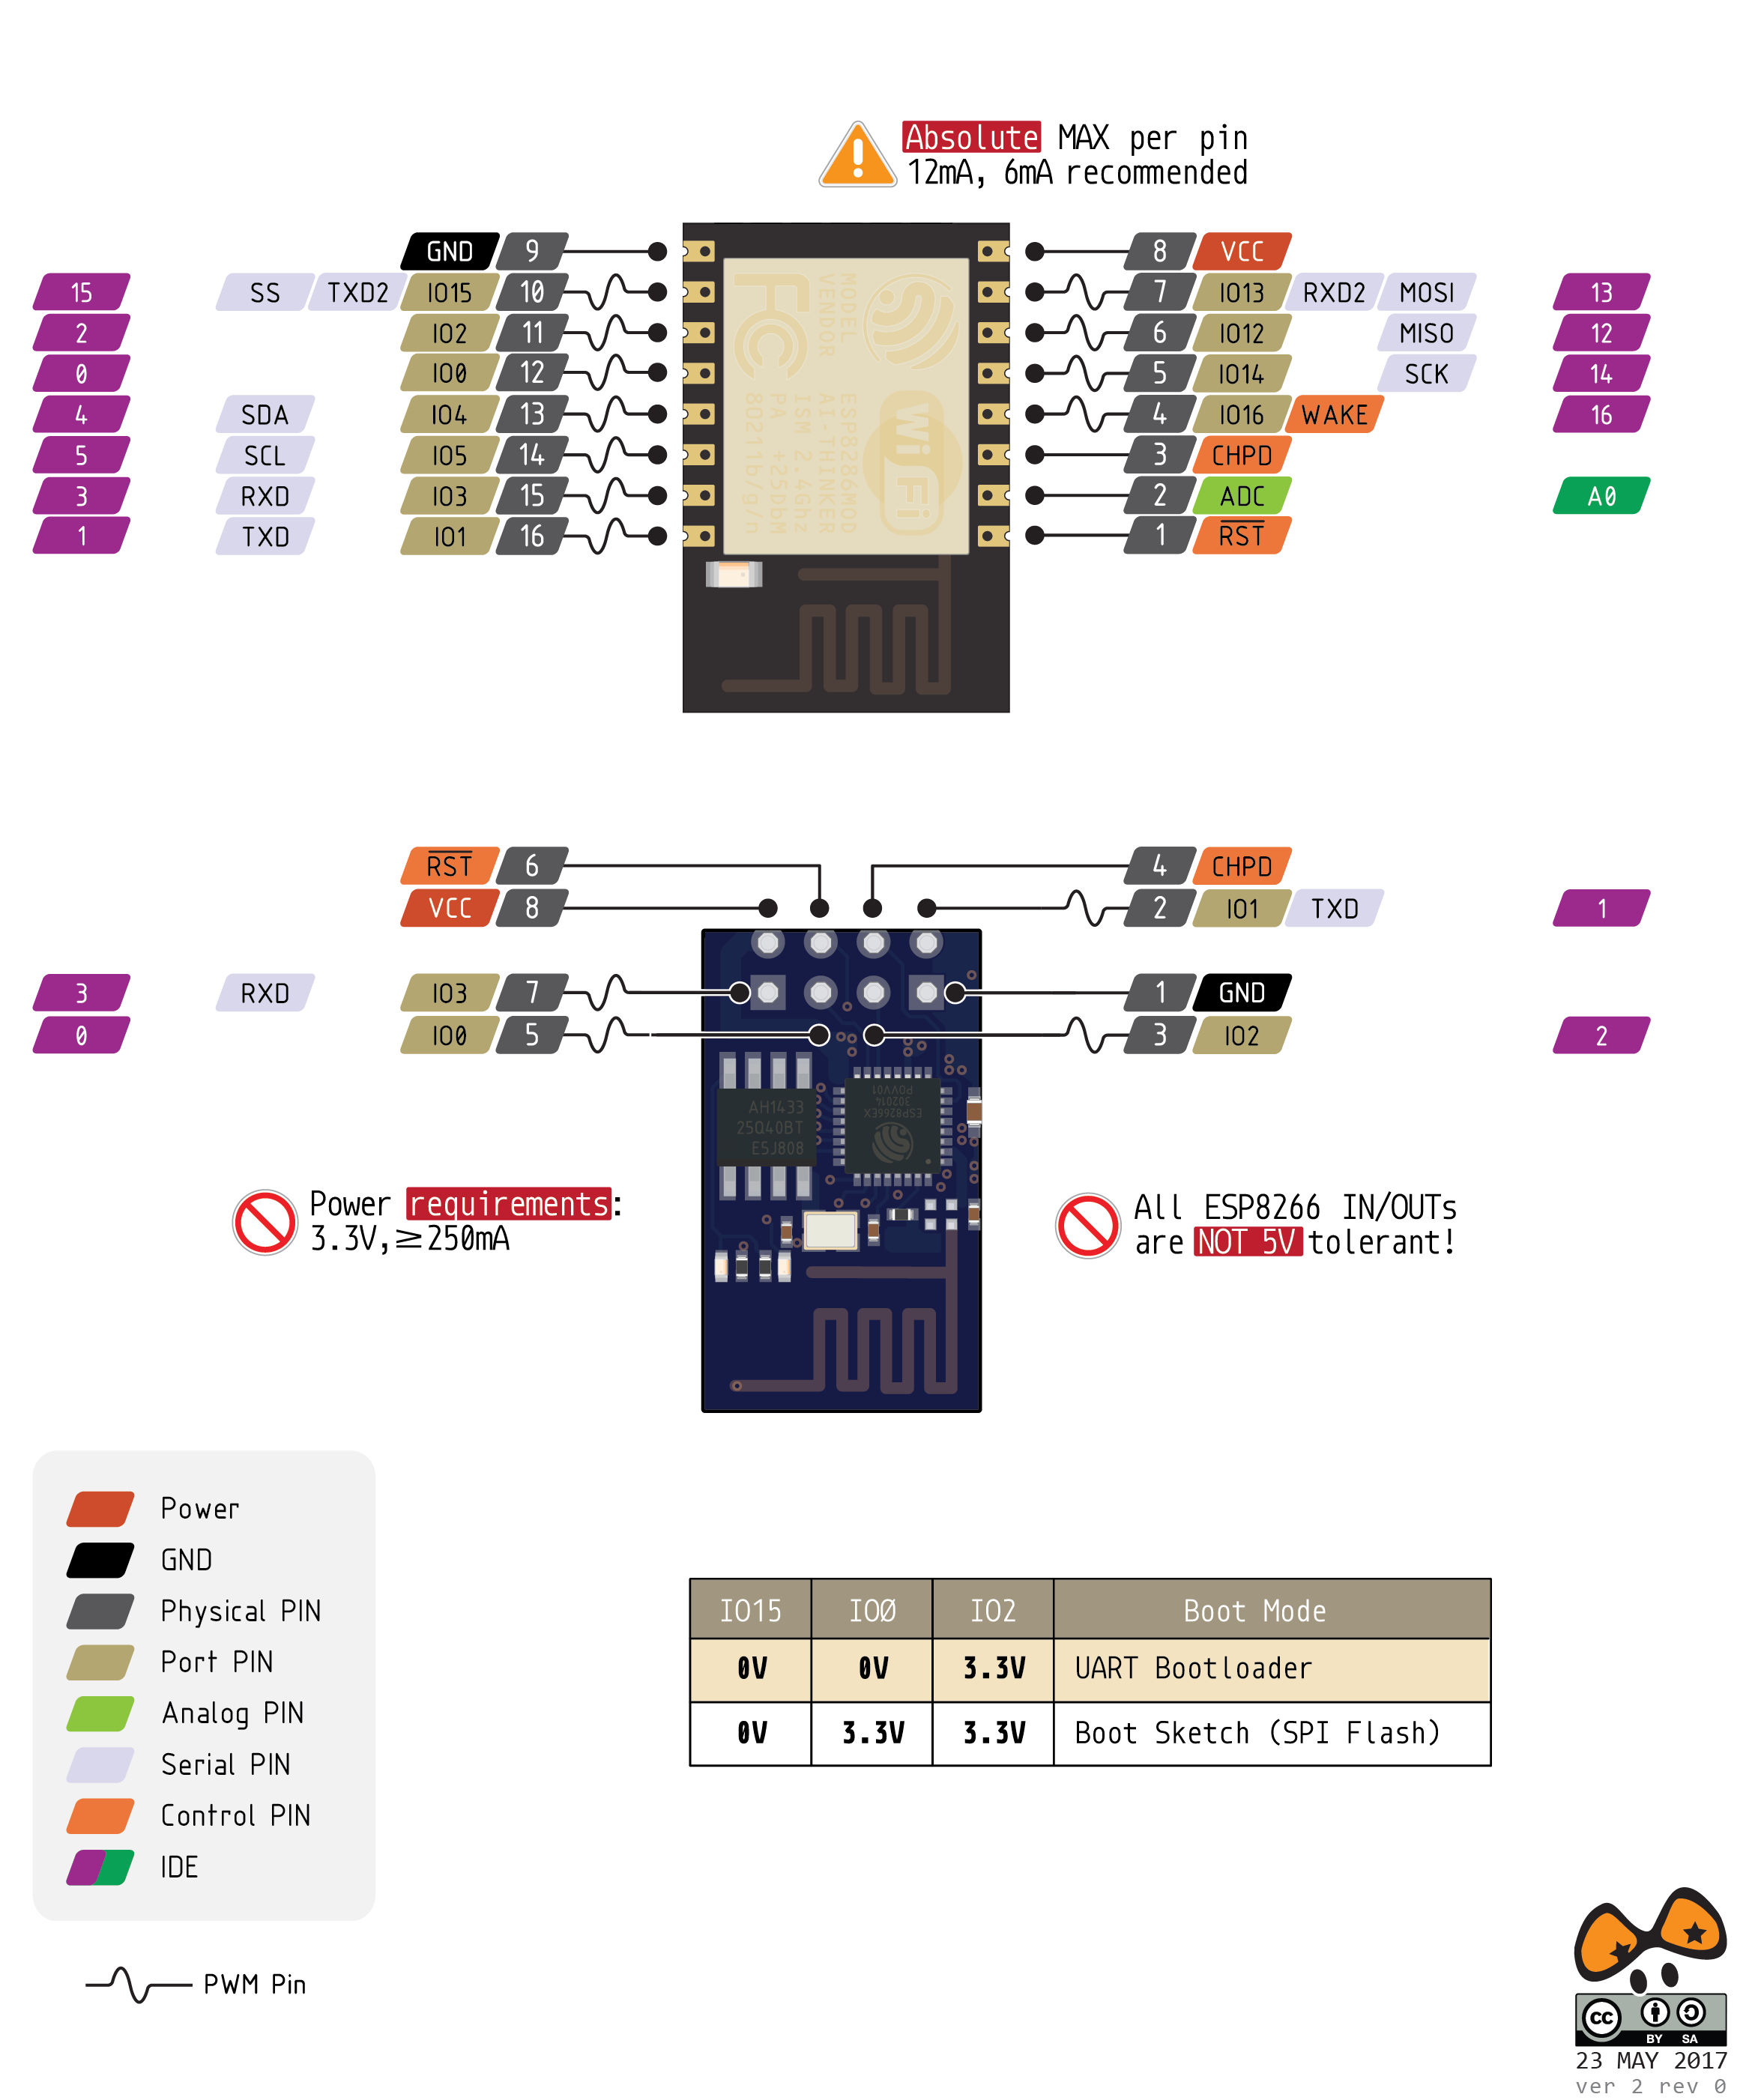
The pinouts are given by: [^2]
Programming the ESP
There are many different ways to program the ESP. Usually when you receive the ESP it will come loaded with some version of Lua. I had some problems using Lua so instead I used the Sming framework to program in C++. There is also the Arduino Core for the ESP which allows you to program the ESP in the same way that you would an Arduino.
Sming Framework, C++
If you want a lot of control over the ESP I would go for programming using the Sming framework for native development with C++. There are lots of examples available on their github page. A good sample program to start off with is the HttpServer_ConfigNetwork which sets up the ESP with an access point that you can connect to, where then you can choose which Wifi network you would like the ESP to connect to.
I found that on Mac the Sming project is quite tricky to setup. I would therefore suggest using the ESP8266.dev.box project which sets up the Sming framework for you in a VirtualBox using Vagrant. The ESP8266.dev.box also supports a range of other projects outside of the Sming framework.
Arduino Core
The Arduino Core for ESP8266 project can be found here on GitHub. A good library to start with is the Wifi Manager library which turns the ESP into an access point and allows you to connect it to your Wifi network. The Homie framework is an excellent all in one solution for settings up the ESP8266 to communicate over the MQTT protocol.
[^1]: From D1 mini pinouts, Arduino core source code. [^2]: From pighixxx pinout graphic.